
Ease VM admin with Hyper-V snapshots
Thursday, 16 July, 2009
Hyper-V snapshots create recovery points for a virtual machine (VM) so that it can be returned to a previous state later if needed. Snapshots can be taken regardless of whether the VM is running and are completely transparent to its operation. They can save countless hours, allowing an administrator to revert the system's state to a previous point in time when all was well, avoiding sometimes-painful tape restores.
But you need to understand a few intricacies of the technology to make your experience with snapshots more reliable and less problematic. In addition, you must coordinate the timing of the snapshot, which brings the whole process together.
Organisations commonly use snapshots before making upgrades of applications, configuration changes or patches. Note that snapshots are not backups! Snapshots should not be used as a backup strategy. They create dynamically expanding differencing disks, which can slow performance of a virtual machine and fragment the volumes where a VM resides. Creating snapshots just before you make a system change can be a lifesaver.
I had an internal team, for example, that needed to update a version of a portion of medical software that allows the wireless tracking of inventory around our organisation. We took a snapshot of this VM before performing the software update. After the update, the application couldn't locate devices. Since we took a snapshot just before the update, we could restore this system using the snapshot, returning functionality and decreasing downtime. Granted, we could have restored backups of the application configuration files, rolled back to the older version and restored SQL Server, but it was simpler to revert to the working server snapshot that was taken moments before the attempted upgrade. Ah, the beauty of virtualisation. If coordinated correctly, this capability allows an organisation to be more aggressive with updates, patches and configuration changes.
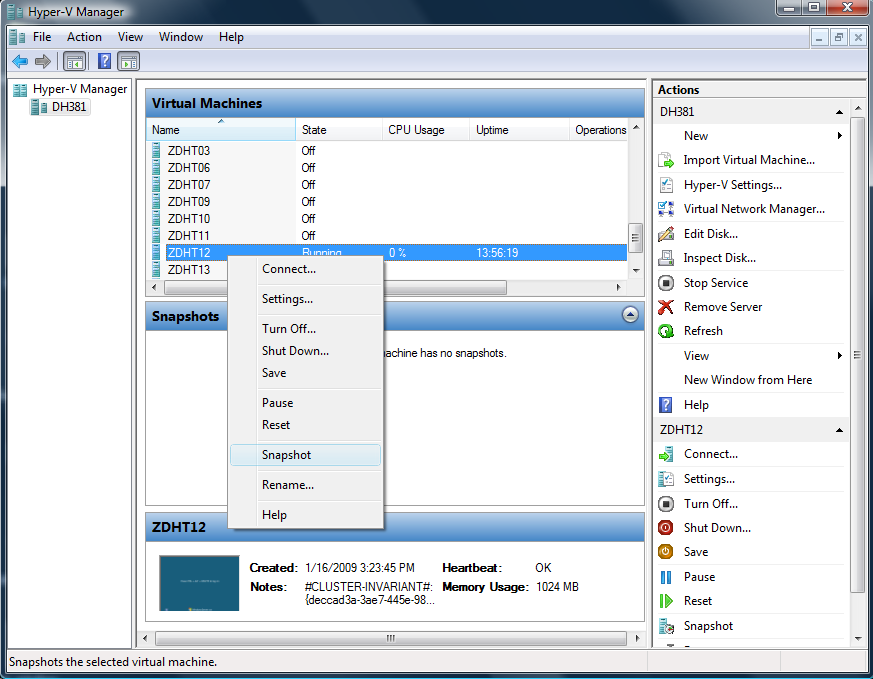
Now that we've established why snapshots save time and improve functionality and uptime, let's look at how they work and particularities of the process to avoid snapshot problems. Taking a snapshot from within Hyper-V Manager in the Microsoft Management Console, is as easy as right-clicking on a VM and choosing Snapshot or selecting the VM and choosing Snapshot on the action bar on the right.
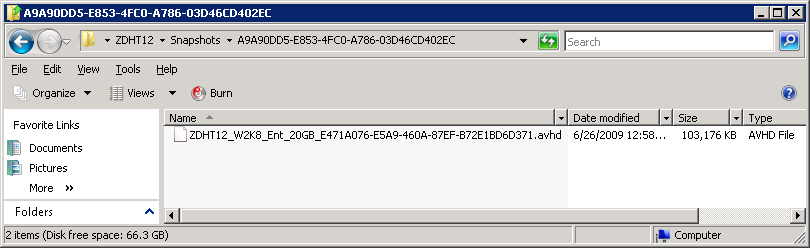
This creates a separate automatic Virtual Hard Disk (.AVHD) (file that dynamically increases in size as changes are made after the point-in-time snapshot.
This is a dynamically increasing disk -- if this snapshot is left in this state for an extended period, it uses disk space above and beyond that of the original .AVHD file. If you consume all the space on a volume with many VMs, it can create problems for all your VMs on that volume. This dynamically increasing disk also increases the fragmentation of the disk on which the .AVHD file lives. This growth can affect the disk I/O performance of not only this VM but also other VMs that may reside on the same volume.
Note: If you ever see a "Paused-Critical" state on a VM, you have run out space on the volume were the VM lives.
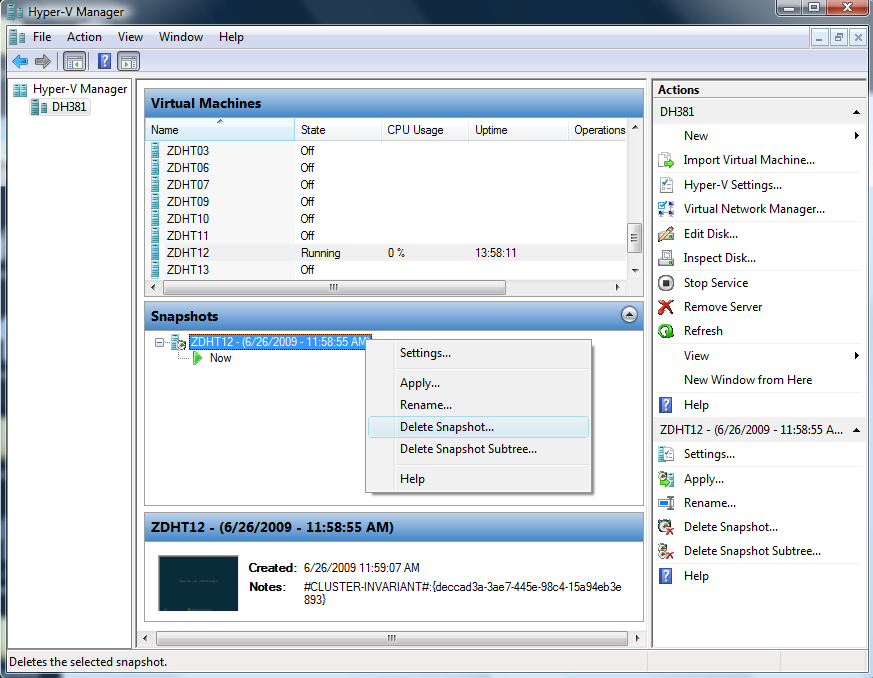
So now that you have made your update and confirmed that the application works correctly, you are ready to delete the previous point-in-time snapshot. This is just as simple as creating a snapshot. Right-click on the older snapshot and choose Delete or go to the action bar and choose Delete.
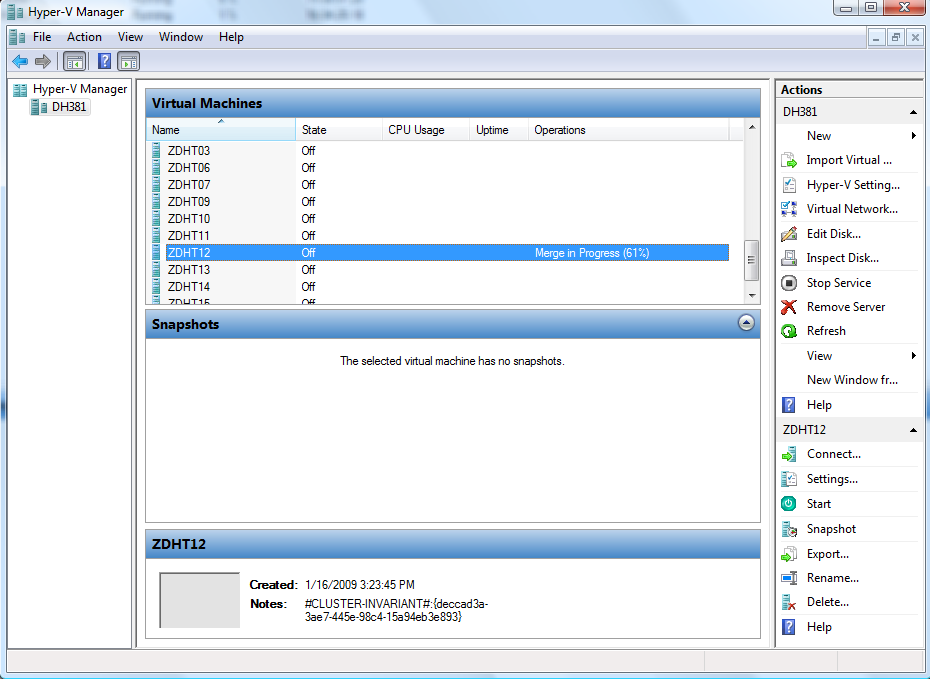
A commonly overlooked task in the snapshot procedure is the merging process after deleting an older point-in-time snapshot. By selecting the previous point-in-time snapshot and selecting Delete, the system continues without interruption. At the file level, however, that .AVHD file still exists in the snapshots folder and will continue to grow. To return to your original VHD file, shut down the guest. At this point, the .AVHD file will merge into the VHD file and be deleted automatically.
Tip: In a Hyper-V clustered environment, you will need to shut down the VM from the "Failover Cluster Management" console, or if you use System Center Virtual Machine Manager, you can right-click on the VM and choose Shutdown. In a clustered environment, choosing Shutdown from within the guest or when using Hyper-V Manager console in MMC will not shut the server down because the cluster services will see this as a VM failure and immediately restart the guest, preventing the merge process from completing.
From my experience, keeping snapshot around for a longer period of time is a bad idea. In production environments, use them as a point in time, confirm that the changes made are successful, then delete the previous point-in-time snapshot. Following these steps keeps host volumes, I/O capabilities and a virtual environment healthy, maximizing the long-term performance of virtual environments.
Storage strategy in the multicloud era
Data has become the essential raw material in the strategic orientation of business, making data...
Private AI models: redefining data privacy and customisation
Private AI signifies a critical step forward towards a more secure, personalised and efficient...
Why having an observability strategy is critical for effective AI adoption
As organisations continue to adopt AI and put it to work in a variety of innovative ways, many...


")